TL;DR With Azure Pipelines and the Particle CLI, it's easy to create pipelines to automatically build IoT device firmware, release binaries, and even run automated tests!
Ever have one of those hobby projects that keeps coming up again and again? You get inspired to start, frantically work on it for a while, then set it aside because life and work happen.
Or maybe you get spooked by the thing and slowly (or quickly) back away?

Why is the cat scared of the banana? Maybe he just went Keto.
I know that feeling of dread, especially when it comes to hobby projects.
And yet, there are some that never truly go away. You ruminate on them. You tinker with them a little every once in a while. You keep adding features to your wishlist. The inspiration (or fear) never truly fades, and some part of you just knows that you'll finish that thing one day.
One such project for me is the Brew Buddy. A Particle-powered homebrew monitoring rig that I started over three years ago. I started the project with the Particle Photon, an Adafruit TFT, and a K Type Thermocouple breakout from Sparkfun. I created my own PCBs on my Othermill before getting real PCBs from OSH Park.
I even made a few hacky YouTube videos about the process.
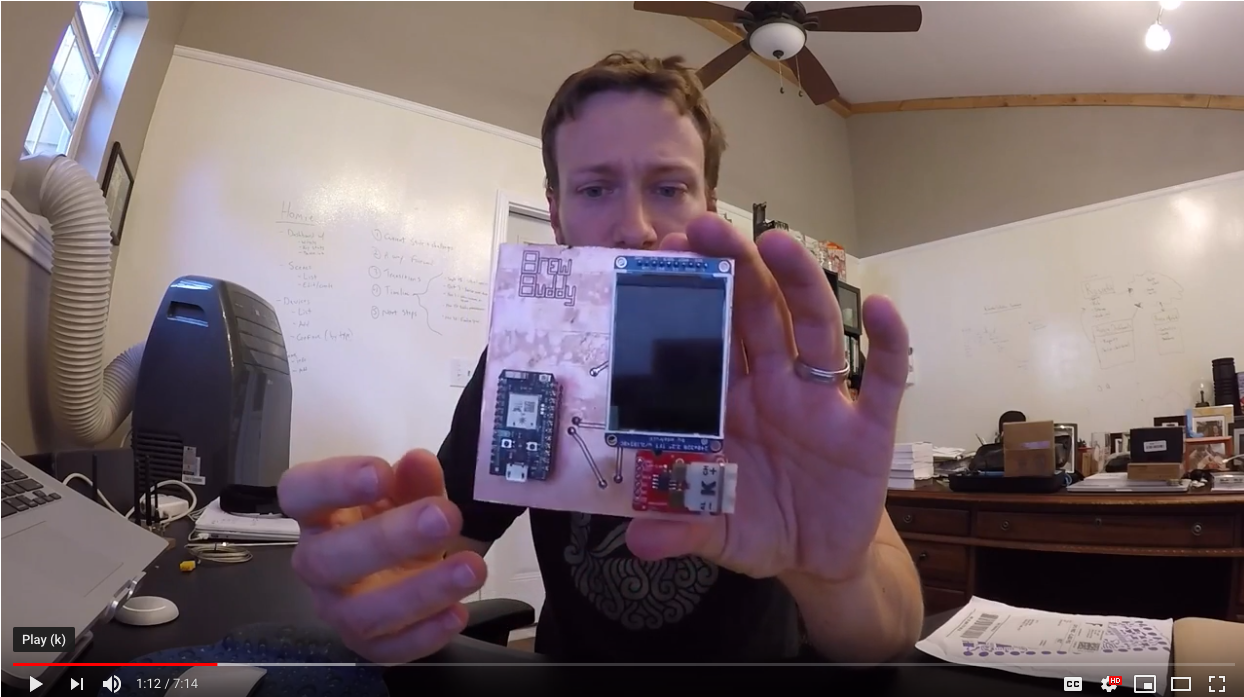
I'm not going to link to those YouTube videos. You're welcome. You can find them if you look hard enough, but don't say I didn't warn you.
As happens, after a flurry of activity, I put this project on the shelf and moved onto other things. Testing each iteration of the Brew Buddy requires "real world" testing, and believe it or not, there actually is a limit to the amount of beer a human being can drink.
Late last year, Brew Buddy clawed its way back into my head. Shortly after Particle released their new 3rd generation devices, the Argon, Boron and Xenon, a little voice ever so softly and gently said "You know, that Argon would be great for Brew Buddy. And you can add those new features you've been thinking about."
Powerless to resist the lure of new hardware, I picked the project back up in January. I live streamed a lot of my initial work on my Twitch channel and published a post of the Photon to Argon port on the Particle blog.
I was sucked back in.
Enter Azure DevOps
One of the things I love about hardware projects is that they give me an excuse to explore related topics or concepts that I've been itching to try. The original Brew Buddy, for instance, was a gateway into PCB design, which has become a bit of an obsession for me over the last few years.
Been doing a bit of PCB art lately, in addition to our badge design. @mrtwinkletwink has some awesome stuff, and I was inspired to create this. I give you the #TrashPanda badge... #badgelife pic.twitter.com/C7Pc6QpNkL
— Brandon Satrom (@BrandonSatrom) July 2, 2018
For this refresh, I really wanted to explore the DevOps side of firmware/IoT development. I'd been hearing a lot of good things about Azure DevOps and the new Pipelines feature, so I decided to give it a try.
Using Azure Pipelines and the Particle CLI, I was able to quickly automate the process of building BrewBuddy firmware, and releasing binaries, when needed. Here's a quick overview of the steps I took to get this working.
1. Set up Azure DevOps
To use Azure Pipelines, you need an Azure DevOps account. Microsoft has extensive docs on this process and I won't repeat them here. Head on over to dev.azure.com to get yourself all set-up. You'll need to create an Azure DevOps organization before creating a project, and a GitHub account so you can connect your Pipeline to a relevant repository.

2. Create your first pipeline
With an Azure DevOps organization created, you're ready to create your first Pipeline. If you're just exploring Pipelines, Microsoft has some quick-starts you can clone to try everything out.
When you create a pipeline, you'll be given two options for authoring: creating the pipeline definition in YAML, or through a visual editor. There are pros and cons to each. I opted for the YAML approach so that I could version the build process in my Brew Buddy repo.
If you're ready to roll on a real project, the first step is to select a source repo for your pipelines, which can be a repo in GitHub or Azure repos.
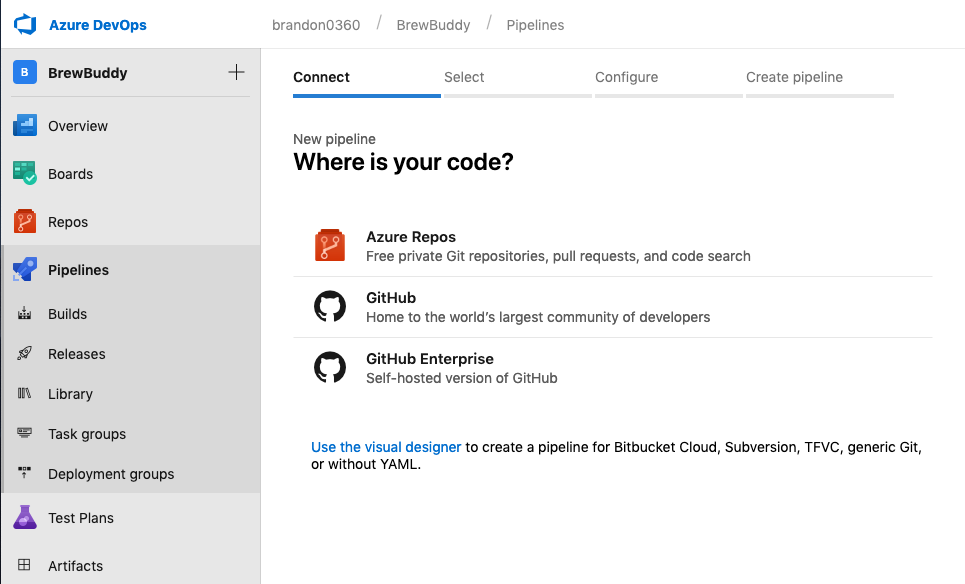
The next step is to choose a repository and then select a starter configuration. There are a ton of options here, so you should find something that works with what you're building.

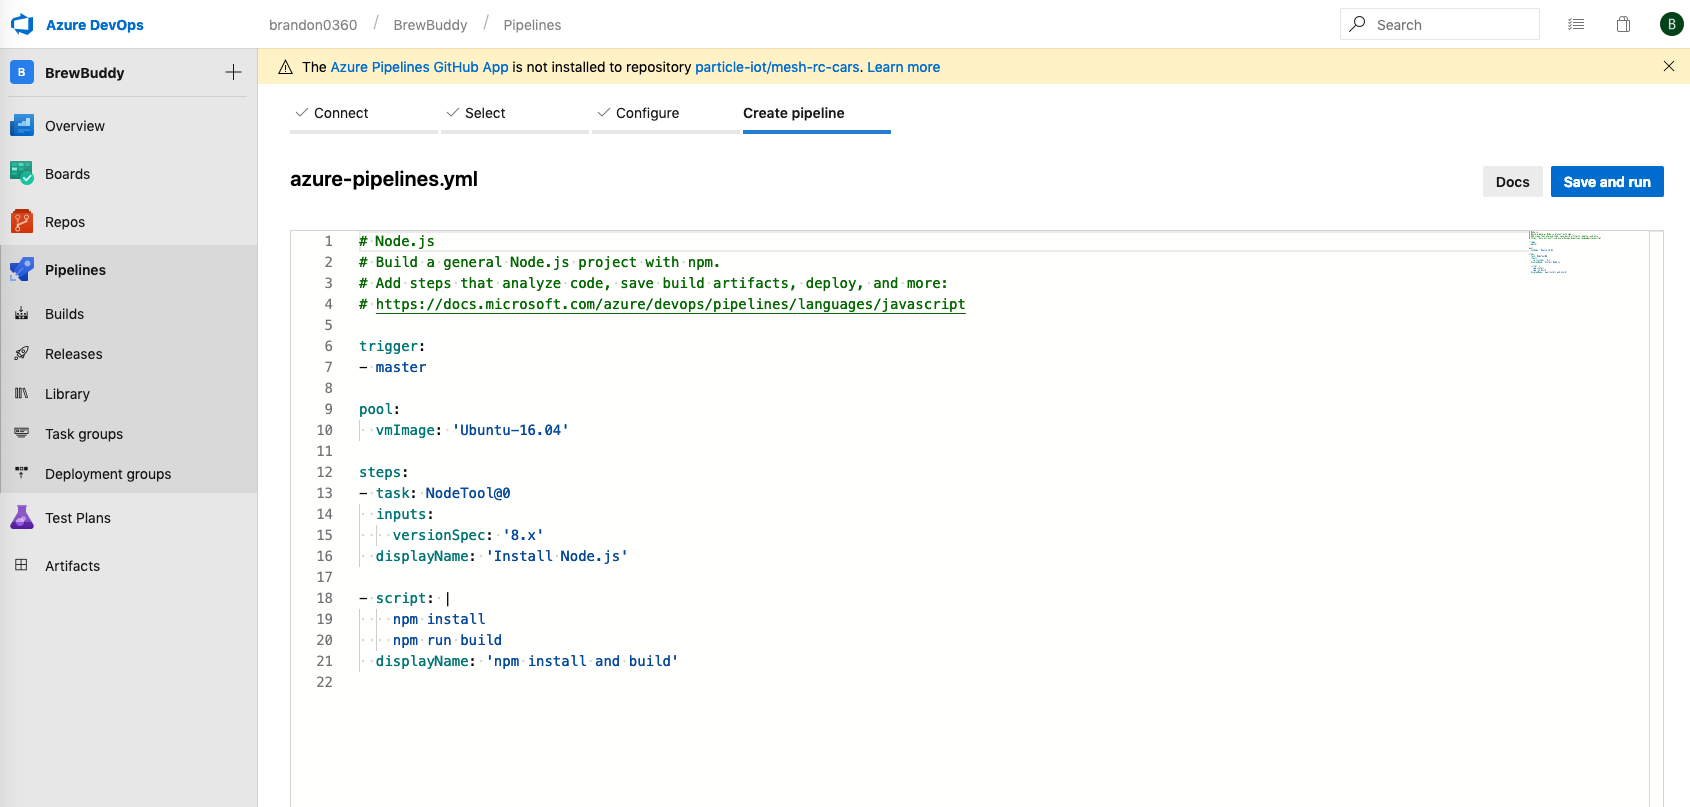
Since I'm building a firmware project, you might think I chose the C/C++ with GCC option. Not so! While I could do that, I wanted to do cloud builds with the npm-based Particle CLI, which means I don't need to install a local GCC toolchain, even in my build environment. Instead, I picked the Node.js option, which gave me a nice pre-configured YAML file ready to be customized.
3. Set-up Triggers and define a VM Pool
The default pipeline will have a few things pre-defined for you, including a single trigger and pool. Triggers define when to run the build pipeline and pools specify in which types of virtual environments you want the pipeline to run. Here are the tweaks I made for my build.
trigger:
- master
- feature/*

pool:
  vmImage: 'macOS-10.13'
By default, builds will trigger on all branches. I changed this slightly to build on both master and any feature/ branches I create.
For the VM pool, I am building with macOS because this closely mirrors my development environment. The Particle CLI is supported across Windows, Mac and Linux, so I didn't really need to change this, but I couldn't resist. We live in a world where Microsoft provides automated build services on macOS in Azure. What a time to be alive.
4. Use Steps to facilitate dependency installation, builds, and more
In Azure Pipelines, Steps make the bulk of a job. Every pipeline can define one or more steps to install dependencies, run scripts, build artifacts, run tests, and more. For the purposes of this project, there are five steps I needed to take to get from sources to a firmware binary.
Install Node.js
First, I need to install Node.js. The template includes this task, but I tweaked it to include Node.js 9.x.
- task: NodeTool@0
  inputs:
    versionSpec: '9.x'
  displayName: 'Install Node.js'
Install the Particle CLI
With Node.js (and npm) installed, the next step is to globally install the Particle CLI.
- script: |
    npm install -g particle-cli
  displayName: 'Install the Particle CLI'
Login to the Particle CLI
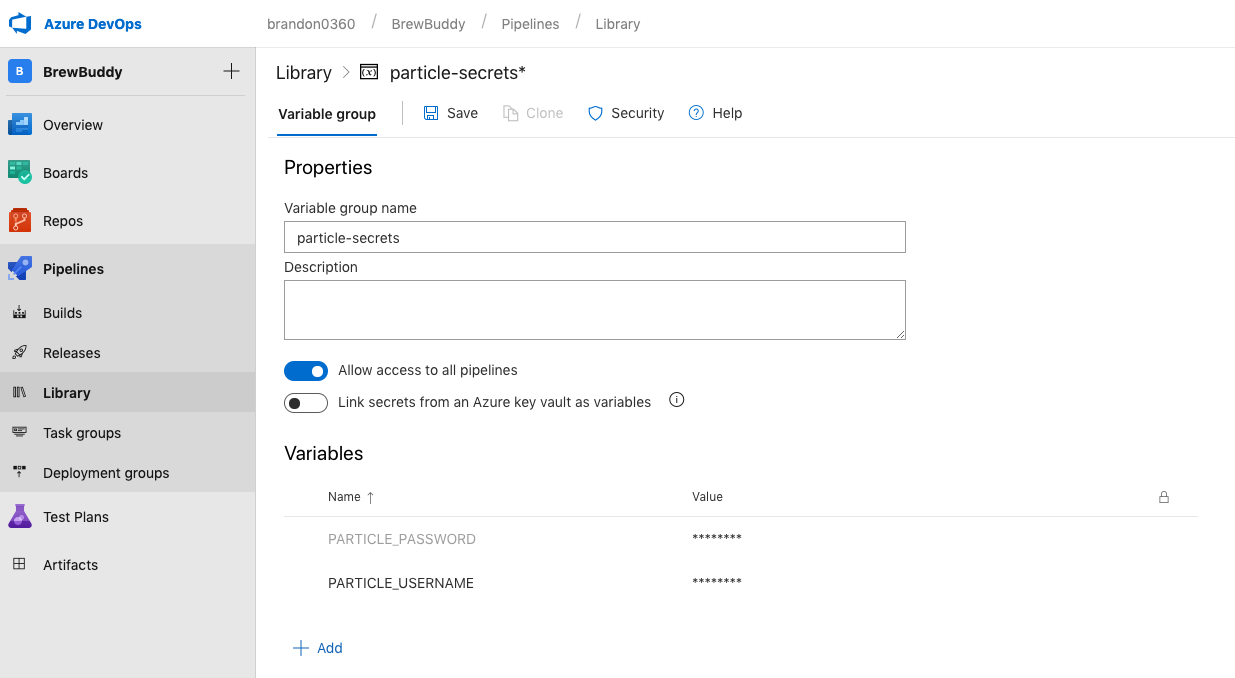
The Particle CLI can perform cloud-based firmware builds, but one must be logged into one's Particle account in order to use this feature. I have an account and credentials that can be used by the pipeline for this job, but I wanted to specify those credentials in a secure manner (as opposed to committing my username and password to source). Thankfully, Azure Pipelines provides support for variables via a Library for every pipeline. I created a group called particle-secrets and added PARTICLE_USERNAME and PARTICLE_PASSWORD variables with the appropriate credentials.
To use variable groups, I can a reference to the group at the top of my YAML.
variables:
- group: particle-secrets
Which allows me to reference those variables in the particle login command.
- script: |
    particle login --username $(PARTICLE_USERNAME) --password $(PARTICLE_PASSWORD)
  displayName: 'Login to Particle CLI'
Build a firmware binary using the Particle CLI
Once logged in, I can use the particle compile command to build a binary that targets the Particle Argon and version 0.9.0 of the Device OS firmware.
- script: |
    particle compile argon --target 0.9.0 brew-buddy-firmware --saveTo brewBuddy.argon.bin
  displayName: 'Build Firmware'
Copy the firmware binary to a staging directory
With a binary in hand, I'll copy the .bin file into a staging directly. This allows me to pick up the binary for the last task.
- task: CopyFiles@2
  inputs:
    sourceFolder: '$(Build.SourcesDirectory)'
    contents: 'brewBuddy.argon.bin'
    targetFolder: '$(Build.ArtifactStagingDirectory)'
5. Create a GitHub release when merging to master
The steps above run on every check-in and against all my branches to ensure that I can always build firmware and breaking changes aren't committed to my project.
I do all of my development in feature/ branches, and while I want to continually run builds, I only want to release new firmware when a feature branch is merged to master. Using the condition statement, I can specify that I only want to run the release task if all prior steps are successful and the source branch is master.
# GitHub Release
- task: GithubRelease@0
  condition: and(succeeded(), eq(variables['Build.SourceBranch'], 'refs/heads/master'))
  displayName: 'Create GitHub Release'
  inputs:
    gitHubConnection: bsatromBB
    repositoryName: bsatrom/brew-buddy
    tagSource: manual
    tag: $(Build.BuildNumber)
    assets: $(Build.ArtifactStagingDirectory)/*.bin
As a part of this final task, the assets input will grab my firmware binary and include it as a part of the release.
6. Run the Pipeline!
With the pipeline in place, the next step it to run it, which can you can do via a check-in, or trigger manually in the DevOps portal. After a few (dozen) tweaks, I was pleased to see rows and rows of green in my builds.

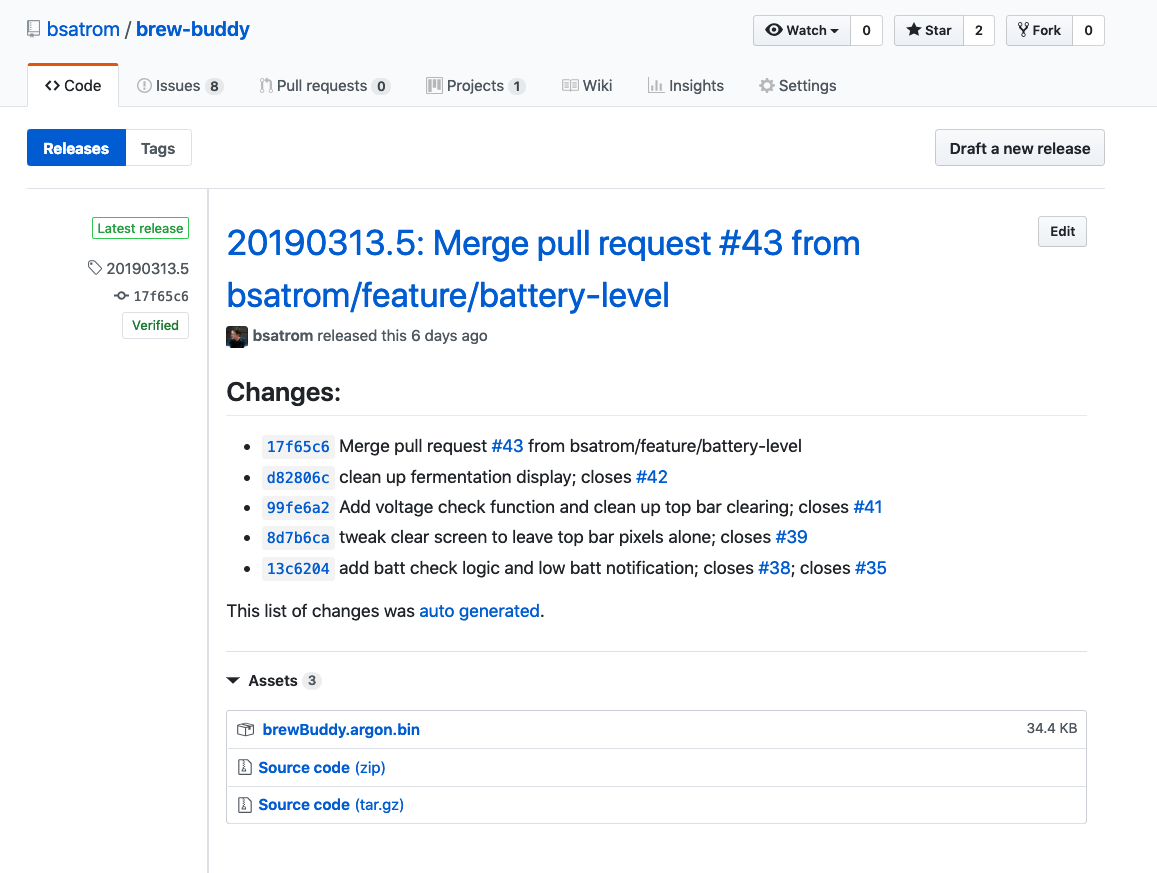
And, every PR merged to master results in a new release with an auto-generated change list and a shiny new binary.
My full pipeline YAML is available in the Brew Buddy GitHub repo
What's next?
My experience with Azure Pipelines has been smooth so far. I had a few fits and starts with creating variable groups and getting the GitHub release task right, but no more than one would expect when using a new, unfamiliar service. I've been running the above pipeline for a couple of weeks, and it has been a great addition to my workflow.
Of course, as a constant tinkerer, there's much more I want to do. Now that I have automated firmware builds, why not use the Particle CLI to do an over-the-air (OTA) firmware update to a dedicated device? After that, why not run automated integration tests using Particle Variables, Functions and Pub/Sub primitives?
If all goes well, I'll check back in with another post on that phase of the project in a few weeks.
Or maybe I'll get distracted by something else.
 bsatrom